Three ways to enable the I2C interface on Raspberry Pi
This article covers how to enable the I2C interface on Raspberry Pi OS only. The steps below are for Raspberry Pi 3 Model B, but it should work on any Raspberry Pi 2/3/4 models as well.
In this article, I will cover two basic methods on how to enable the I2C interface: using the Raspberry Pi Configuration UI utility, and using the raspi-config CLI utility.
Enable I2C interface using Raspberry Pi Configuration UI
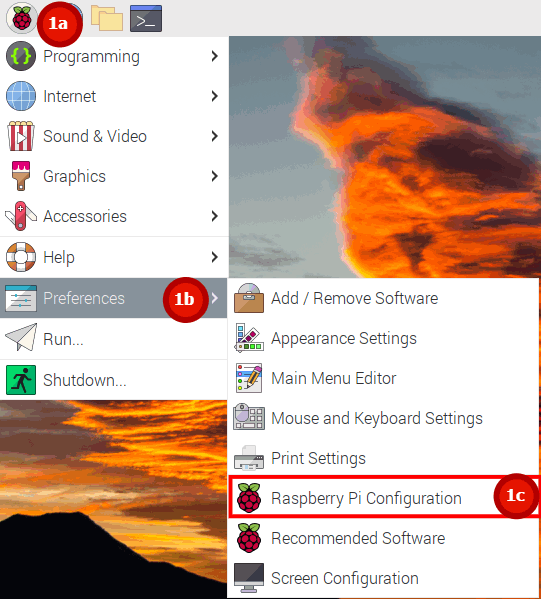
Step 1: Assuming you already logged in, go to the Applications menu on the top left corner(1a). From the Applications menu, select Preferences (1b), and then select the Raspberry Pi Configuration utility (1c).
Step 2: Inside the Raspberry Pi Configuration utility, navigate to the Interfaces (2a) tab and just switch the I2C toggle button (2b).
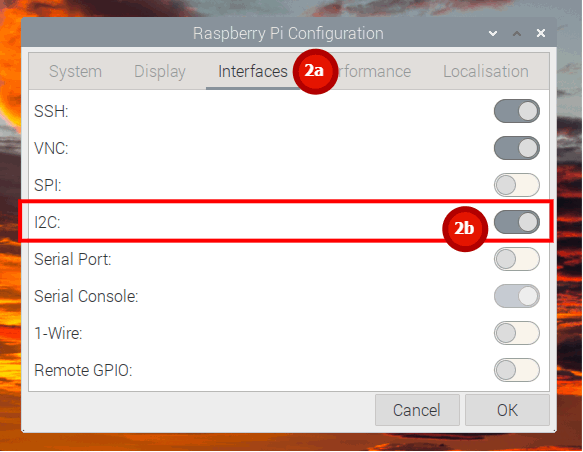
That’s it, no restart is required.
Enable I2C interface using raspi-config utility
There are basically two ways to enable the I2C interface using the raspi-config utility. We will cover both methods in this section.
First method is to use the raspi-config terminal UI, for this:
Step 1: In the terminal type:
sudo raspi-config
You’ll see the following options.
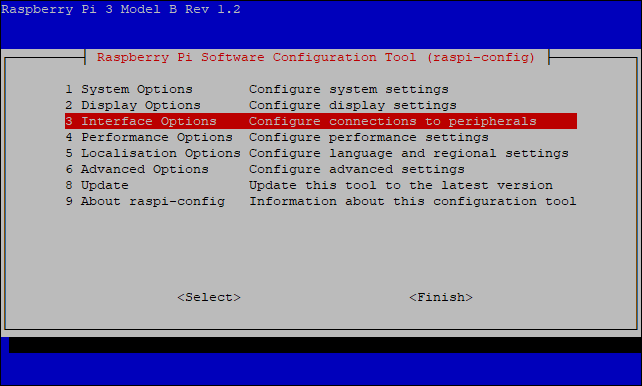
Navigate to the third option Interfaces Options and hit Enter.
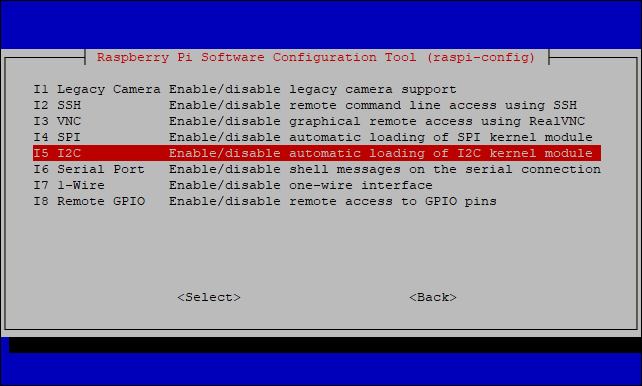
Step 2: Now navigate to the I2C options and hit Enter again.
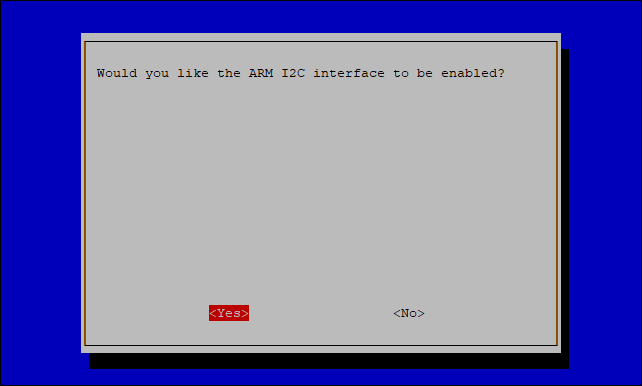
Step 3: The utility now should show a dialog asking you if you want the I2C interface to be enabled. Select Yes.
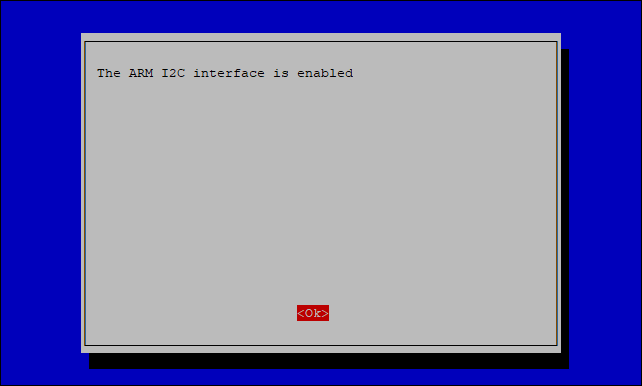
Step 4: The final dialog should show you a message if the I2C interface was enabled successfully or not.
The second method uses the same raspi-config utility with some additional parameters. This method is useful when you would like to enable the I2C interface from a script.
Step 1: Check if the I2C interface is enabled or not:
raspi-config nonint get_i2c
If the response is 0, then the I2C interface is enabled, nothing to do. However, if it is a non-zero value, go to the next step to enable it.
Step 2: Enable the I2C interface simply by running this command:
sudo raspi-config nonint do_i2c 0
Make sure you run the above command as a sudoer. You can use the above command to disable the I2C interface, just specify 1 instead of 0.
Conclusion
Now you know three ways to enable the I2C interface on Raspberry Pi. You can use the Raspberry Pi Configuration utility when you are logged into the Raspberry Pi OS itself, directly or through VNC application. For those who like the command line or when the GUI is not available, you can use raspi-config utility. Note that the above will work only on Raspberry Pi OS, as far as I know, other distros for Raspberry Pi don’t have the above mentioned utilities.